
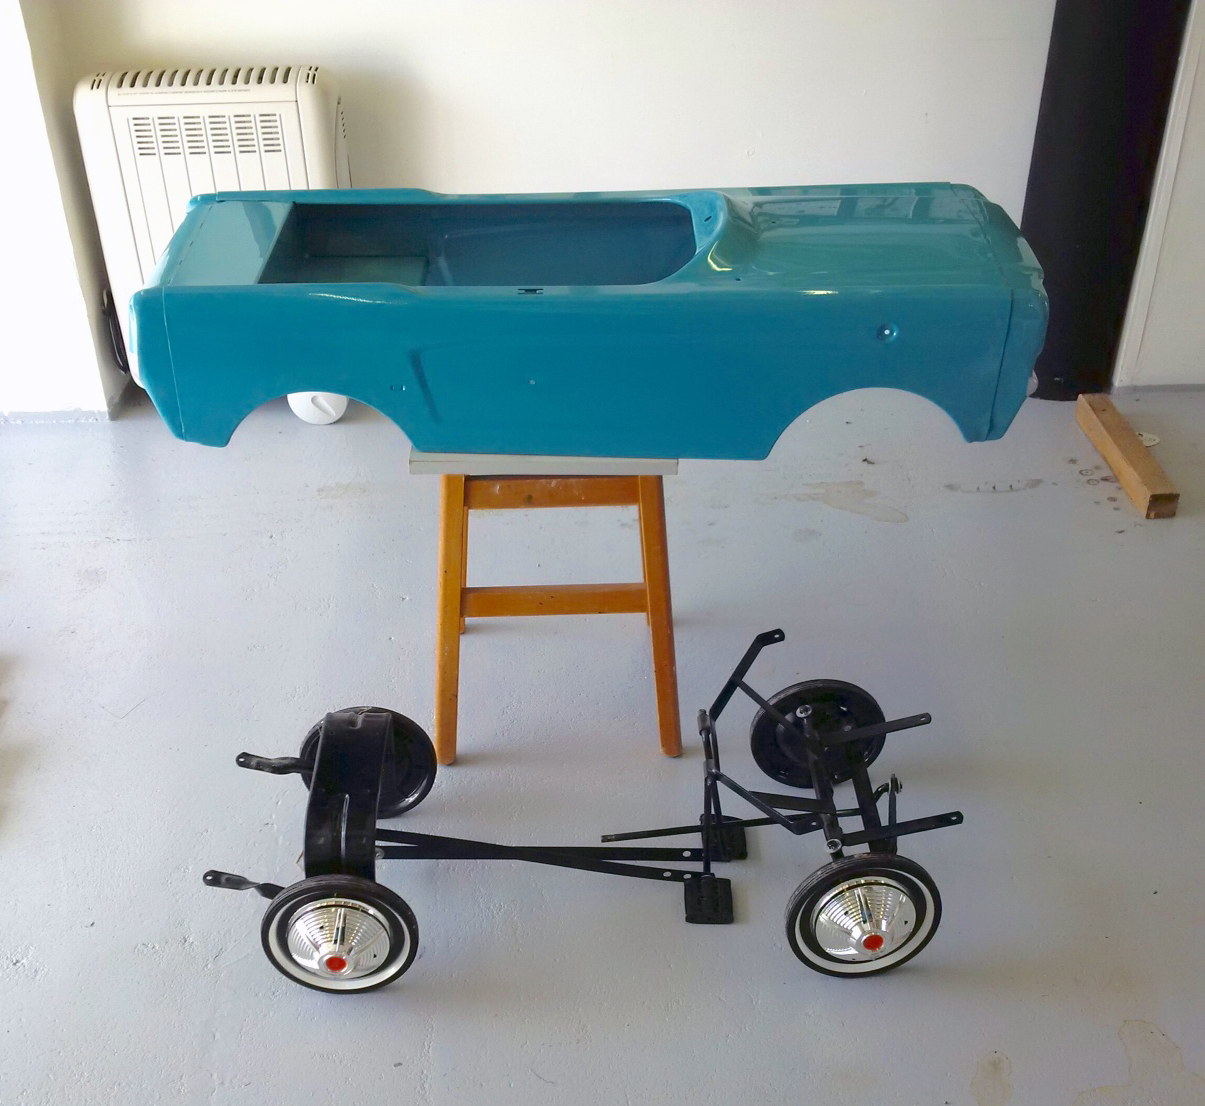
Here at Mustang Maniac we like to build great customer relationships over the long-term and we have many loyal customers who come back year after year for products and services etc – but a few weeks ago we were contacted with an unusual request from one of our youngest followers. A four-year old contacted us via her grandfather to ask whether we could locate a Mustang pedal car. Originally Ford approved a Mustang pedal car and launched it at the same time as the full size Mustang. It sold over 100,000 units in the first year. Later, the well-regarded Mustang part supplier Scott Drake reproduced a Mustang pedal car using the exact designs from the original. These days, any Mustang pedal car is a rare beast indeed so it took all our investigation skills to track one of these little babies down. As we hate to let any of our customers down and particularly one who is only 4 years old, we pulled out all the stops and managed through our many contacts to locate one in a garage on the south coast. We sent a truck to collect it, the pedal car in “as found’ original blue colour.

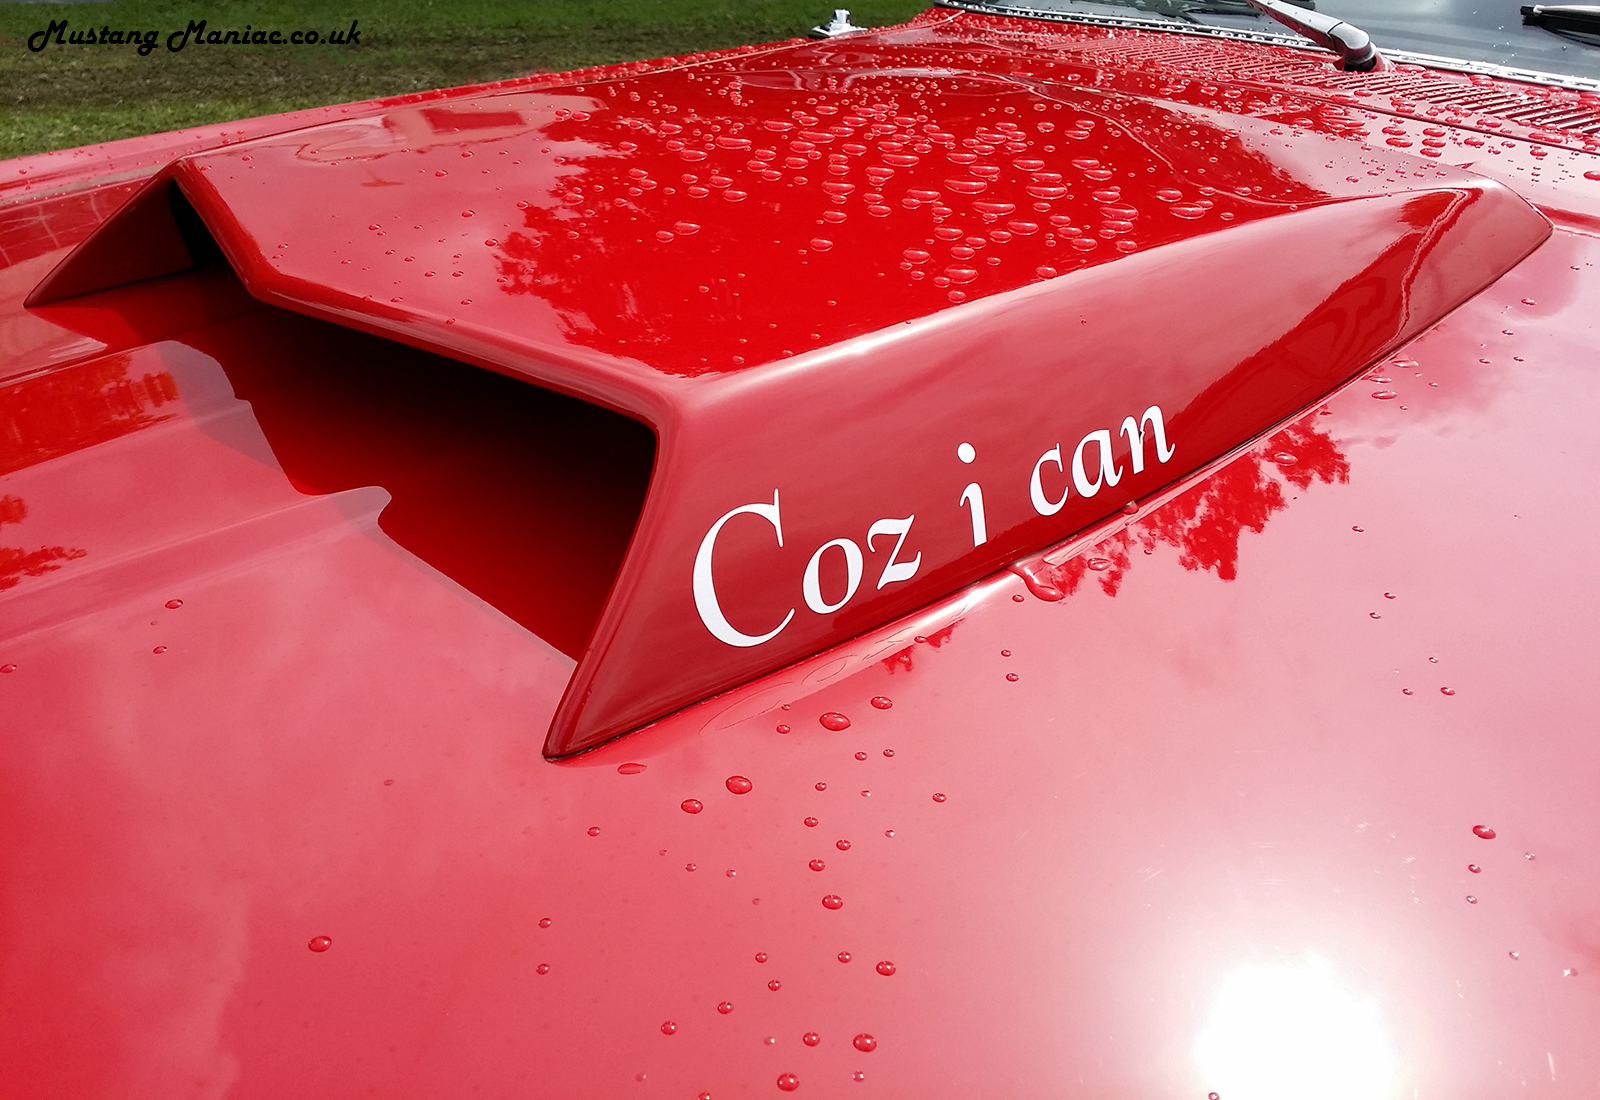
Our little 4 year old customer was truly delighted but, as is often the case, wanted us to customise it to match her granddad’s Mustang……she also wanted it to have a full body-off, nut and bolt restoration as well!! Not to disappoint, we set about a total strip down and while the chassis was being fully restored, Paul the Paint worked his magic on the body, painting it in a rare Mustang colour of Pagoda Green and lavishing it with numerous coats of clear lacquer. When the body shell came back it was reunited with the newly restored chassis. We also wanted to maintain the high standards Mustang Maniac is so proud to be known by; so all fixings, nuts and bolts were polished stainless steel so this little Mustang will last for many years to come.
The assembly line in the workshop goes into the unusual restoration routine.
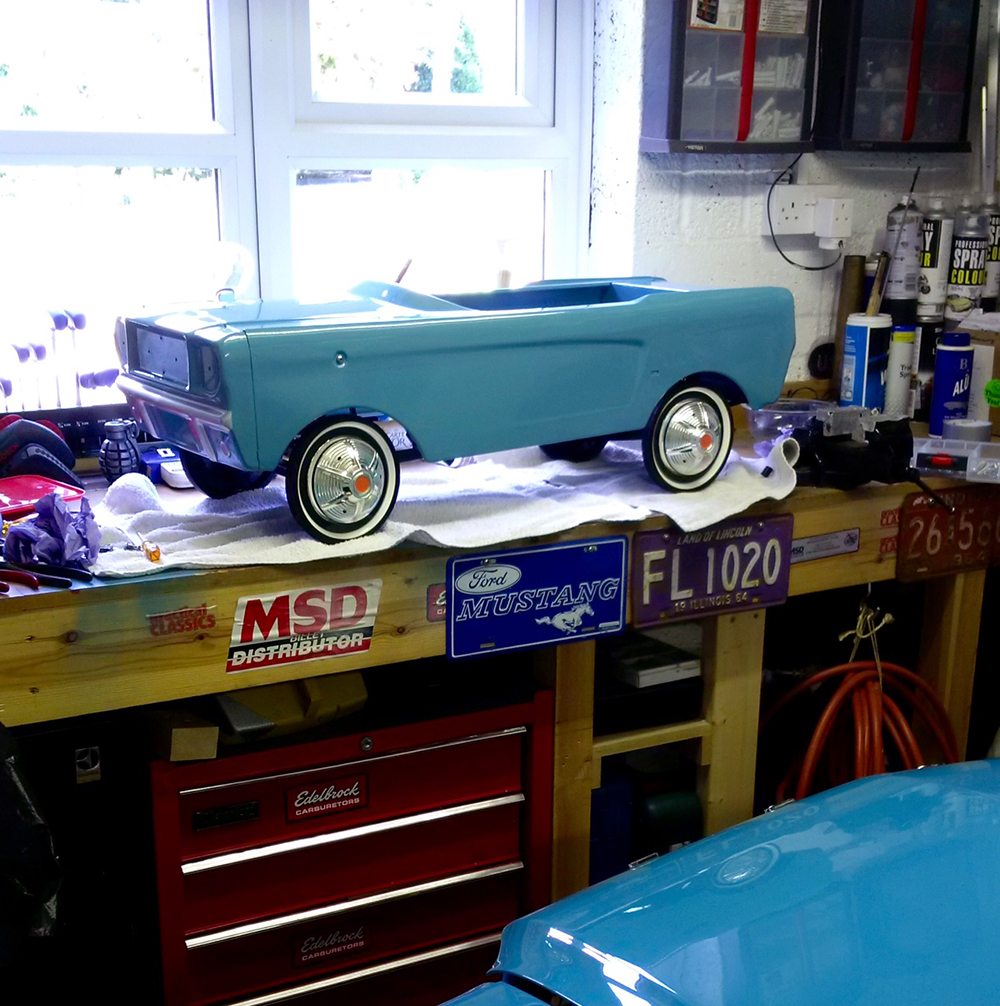
Soon it was time for all those finishing touches that make all the difference to be applied; original pattern decals were tracked down in the USA and were shipped over with Adam’s usual stock deliveries. The decals were carefully applied as if it were fitted to a full-sized Pony car.

Almost finished….
After a final polish, a re-upholstered seat (made from an old door card), it was off for a quick road test. Rumour has it that Adam got stopped by the police on the A10 for ‘excessive speed’. Of course this was strenuously denied as Adam “hadn’t even shifted to top yet”! 🙂

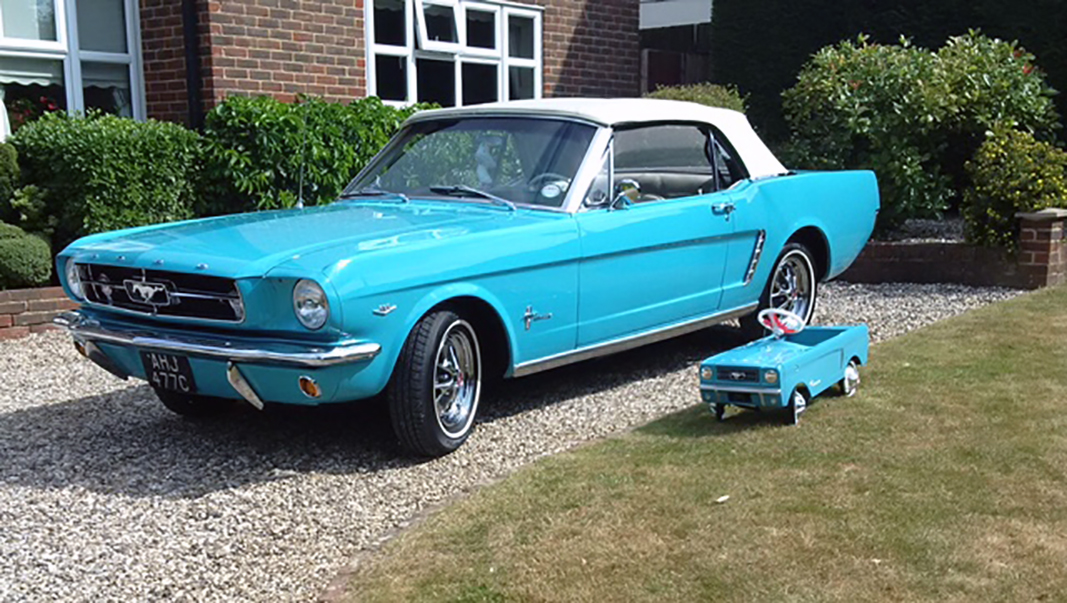
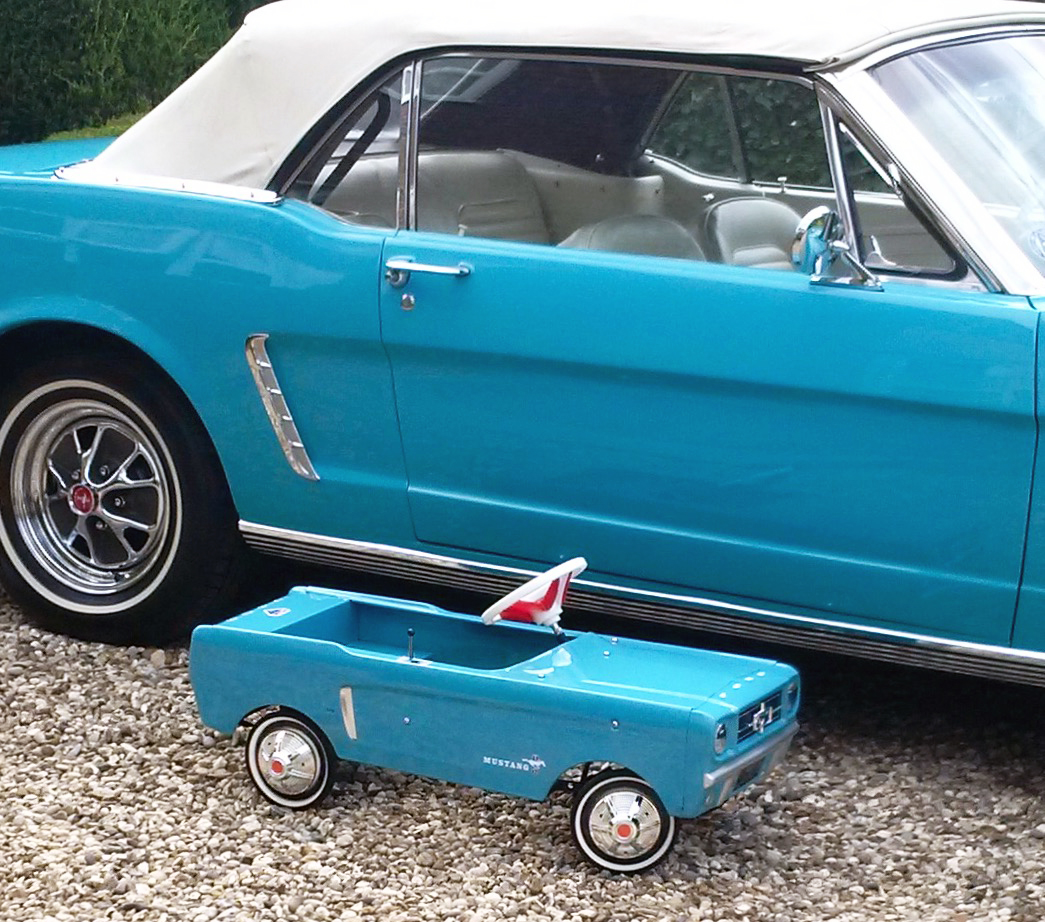
A few final adjustments and the project was completed with matching number plates, baby pony stood next to the even rarer matching big pony!
Our new young customer is absolutely delighted with her new ‘baby pony’ and has sent a huge thank you to the team at Mustang Maniac for finding, collecting and carefully restoring this little beauty for her. Another satisfied customer!
The best part of all this? The grandfather and the four year granddaughter have both decided that once the car is outgrown, the pedal car will come back to Mustang Maniac for a service and a be donated to another deserving little one to enjoy which is just brilliant and a kind thought, A new precedent has been set where the process can be repeated all over again. Thank you GW.
Shelby 1/8th Model
Speaking of “Baby Pony” cars we have built quite a few issues in one go of this amazing model. You can follow the story so far clicking here or past this link into your browser: https://mustangmaniac.org/shelby-gt500-18th-scale-model/
There are some duplicates issues here, left and right sides like the rear wheels and the rear suspension leaf springs. The principles are exactly the same so I won’t repeat myself on those, but you will get the general idea for each side.
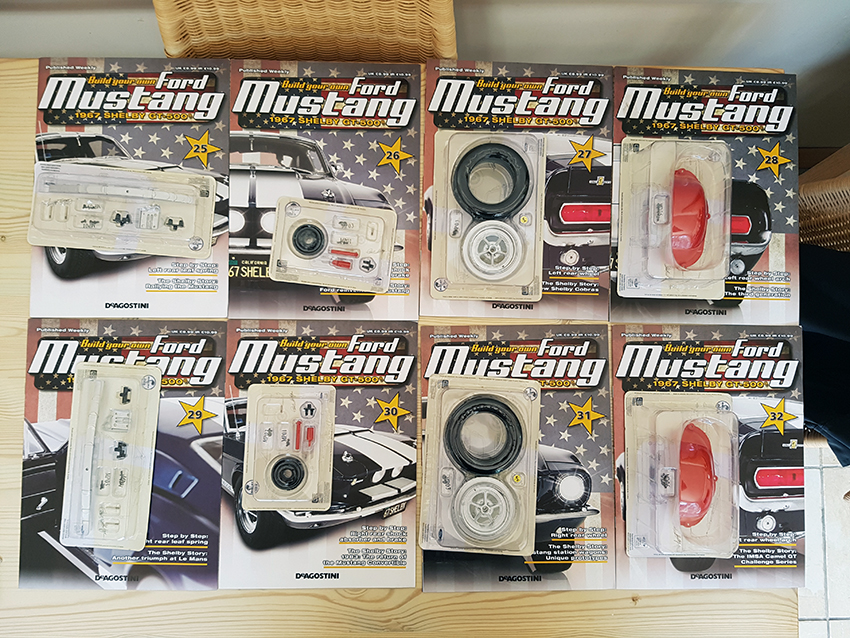
Parts 25 & 26 + 29 & 30
These issues deal with the rear suspension set up and secures the rear axle in place. There are some very intricate bits here and the pins into the top part of the shocks have to be pressed into place with a pair of pliers. make a note of which way round these brackets fit on the end of the leaf springs as they fit the chassis rails, and also which end they are applied too as the leaf springs only fit one way. These top of the shocks are angled so you need to make sure which way round they sit too otherwise the shock sections will not meet correctly.


In the issues 25 & 29 they tell you to secure the axle’s shock mounting plate in place, then in issues 26 & 30 they tell you to remove it and then add the shock bottom section to it. We found this a bit of a mess. So we had both issues open 25 & 26 then 29 & 30 to mix them both together so it’s only fitted once. The shock plate also gets in the way of fitting the shock top to the floor pan too where they suggest you use tweezers to put it in place.


Parts 27 & 31 + 28 & 32
These are the rear wheels, exactly the same principles as the front wheels, heat them up with a hair dryer to supple the tyres up and then press the rims into the tyres. From the parts 26 & 30 there is the brake drum components, locate these to the inside of the rims and fit over the rear axle. A single screw will hold the wheel in place and cover with the centre caps. Parts 28 & 32 are the inner wheel arches, just three screws each side hold them in place, a dead simple set of six issues.


With the parts all in place the rear section will stand on its own and you can get a lot of the parts located onto the chassis and tidy up the box of parts you have.


Parts 33 – 36

These issues see the floor pans moving to the centre sections and the prop shaft, gearbox housing and gearbox brace. Part thirty-three see’s a large section which has a few screws to locate it to the front section of the rear chassis.

Part 34 see’s the centre tunnel continue up to the front section. We found this was a little tricky to locate all in place so we put the screws in and only just caught the threads to allow any adjustments. tightening the back down lifted the front and was awkward to locate. with no pressure on the screws you can just tighten them all up once they are in place.


Turning the model over now will allow the prop shaft to be fitted in place. This comes in two parts and his held in place by two screws from the floor pan.


Parts 36 sees the gearbox housing and the brace fit into place. again dead simple with only a few screws to hold in to the floor pan.


Completed so far.

We are so far impressed with the quality of the plastic part mouldings. We have not had to file any rough edges or plastic lugs of to make things fit. Within this last update we again see the instructions flick between screw part numbers “MD01” or description of the screws which can be annoying at times.
Customer car projects have taken a slight pause while we get some urgent services and a couple of MOT’s out-of-the-way. We will of course bring you updates on those projects for the next post!


What a brilliant story and wonderful to think the pedal car will be used and enjoyed for many more years to come. Well done guys. 👍
LikeLiked by 1 person
We certainly hope the pedal car will be enjoyed for many years to come.
LikeLiked by 1 person
I love all toys great and small.
LikeLiked by 1 person
So do we, it was a pleasure to do something like this and make a little one smile.
LikeLike
Pingback: Baby Ponies — Mustang Maniac – Voices From The Garage