
The principle for changing the springs is similar to all the cars. Here we show you how to do it on the front of a 1965.
In an ideal situation you will need to:
- Lift the car up and make the changes preferably on a lift.
- Geo set up the new stance for the car
- The springs are under high load – be careful with what you are doing.
- We recommend a skilled person to do the changes.
- If in doubt don’t do it.
The engine bay has two shock towers above each wheel where you can see the shocks come up through the middle. With the car on the ground undo the two screws at the top of the shocks to allow free movement of the shock.
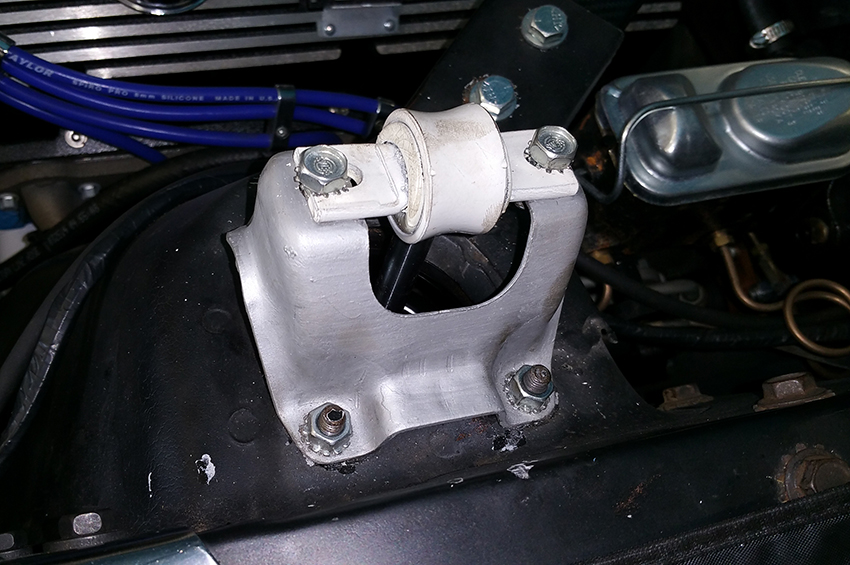
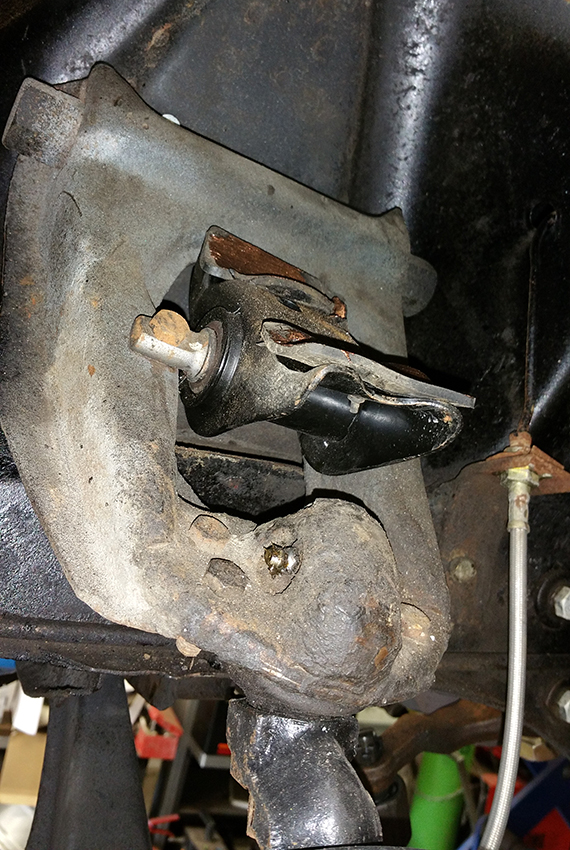
There are three screws on the shock tower cap that need to be undone. This will allow you to remove the cap and drop the top of the shock down. Remove the wheel(s). Under the lower suspension arms there are two more screws for the bottom part of the shock. undo these nuts and the shock will be free to be lifted out.
At this stage you can reverse the sequence to replace the shock. Only ever replace the shocks in PAIRS.
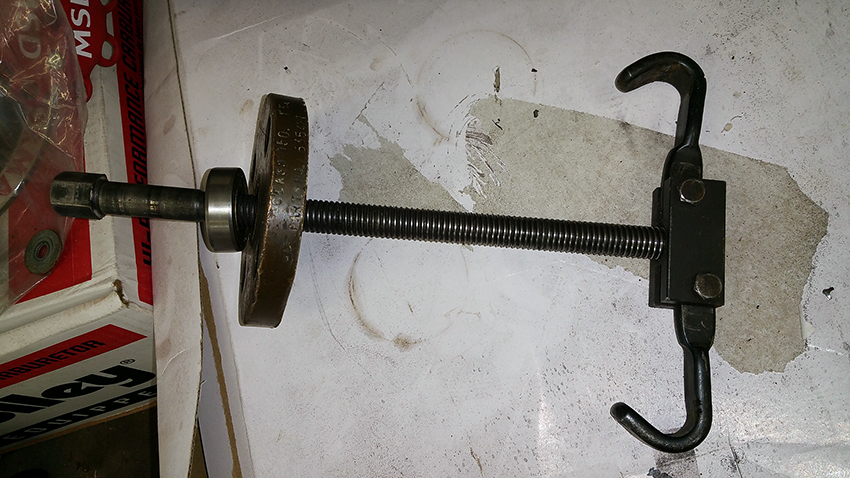
With the shock out you can lift the car up to easily get to the springs. With a spring compressor in place, wind the mechanism to compress the springs smaller so they can be lifted out of the spring perch. At Mustang Maniac we have designed out own unique tool which is far superior to the shop bought ones for use on Mustangs. The custom levers at the bottom are spaced for the coils and the top has a thick plate that takes the pressure on top of the shock tower with the various holes for various years to hold it in place.
Connect your spring tool and tighten up to squash the spring. Extreme care should be taken with the springs.


The springs will now lift out and expose the spring perch.
With the springs out you can see the difference from the standard stock springs to the high performance 1″ lowered springs with 600lb tension load.


Prepare the new springs with new rubbers for the top. We like to put a layer of copper slip on the top and bottom perches to avoid any squeaks.


With the spring ready to be replaced align the spring under the top of the shock tower. As these springs are shorter they can just about be lifted onto the spring perches without the compression tool. Align the bottom of the spring to the perch stop point at the back.


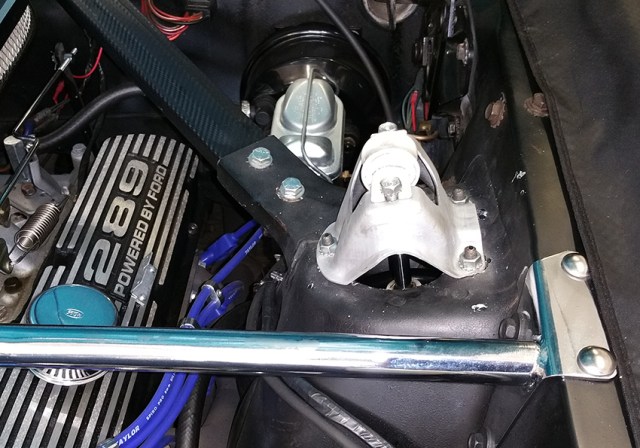
With the springs now in place insert the shock back into the tower and tighten the two bolts, rubber washer and metal washer on each side of the shock.


Replace the shock tower caps bolting into place then the two bolts for the shock itself.
The car should now be taken for specialist wheel alignment. Replacing the shocks should not effect the wheel alignment but we would recommend it regardless.
The adjustments are given a good spray of Gibbs to free them up to allow the adjustments to be made.
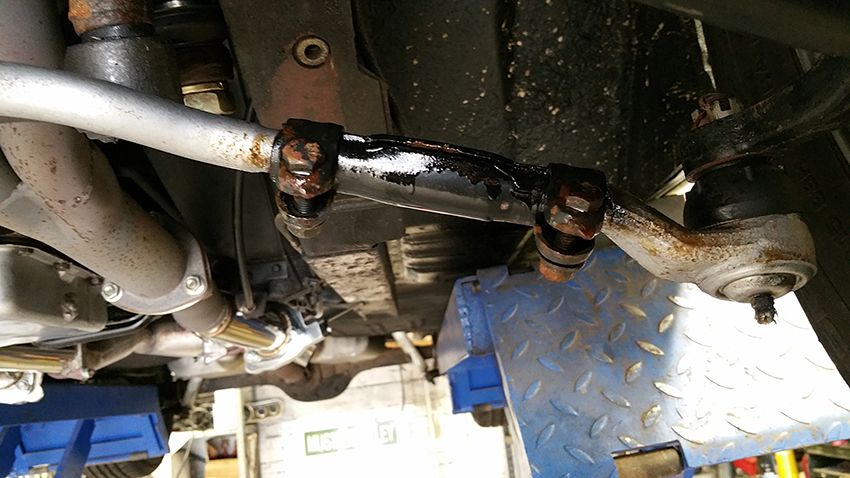
The sensitive laser wheel alignment is set up to adjust the settings.


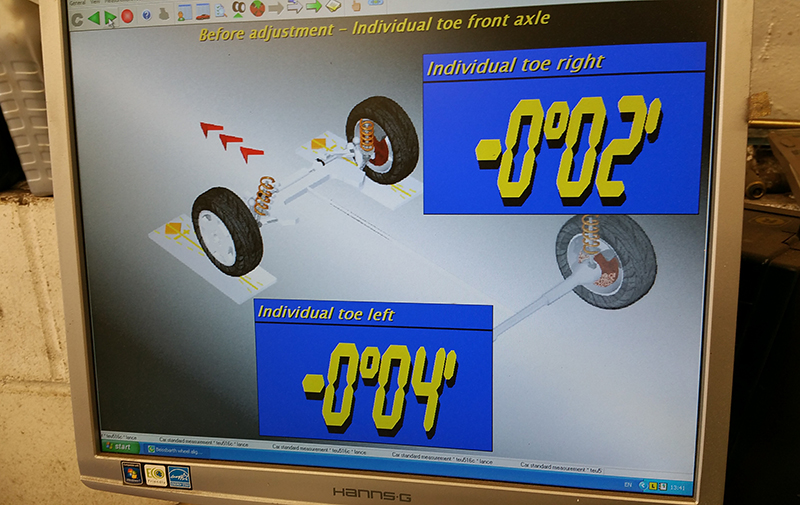
The display for settings before the adjustments and measurements are made.
 With all the adjustments made tighten everything up and enjoy your very much improved handling car.


