
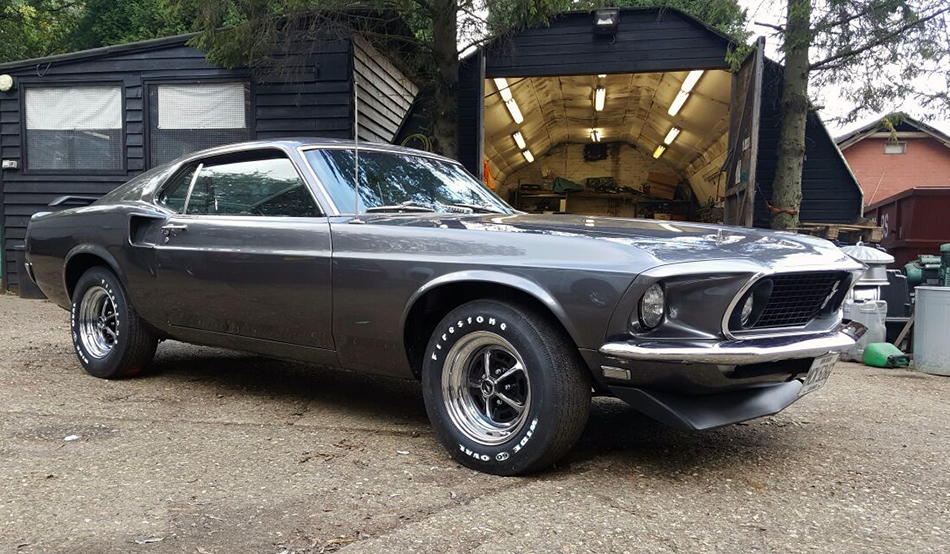
This customer’s car is going to be the John Wick clone in the UK as far as we know. The painted body was not handled by ourselves on this occasion, but we get to work with a freshly painted body. First of all a little about the John Wick car. The car is in fact a 1969 Mach1 and not a Boss 429 (7.0 litre) v8 as mentioned in the film. The subtle give away was the hood scoop not being big enough, also the Boss 429 didn’t have a rear spoiler either.
The Movie Car


The Clone Begins


We have been delivered a huge selection of parts that had been removed prior to us taking delivery, some of which have seen better days though. We will of course inspect those parts carefully before re-assembly back to the car. We will be bringing you plenty of updates on this car as we go along.
Update 23/10/2016
The car is pretty much completed outside with only a few more bits to add, while we are waiting for the gauge overlays for the dash to be shipped over. Half the dash is in and the centre console, enough to take it for a road test.


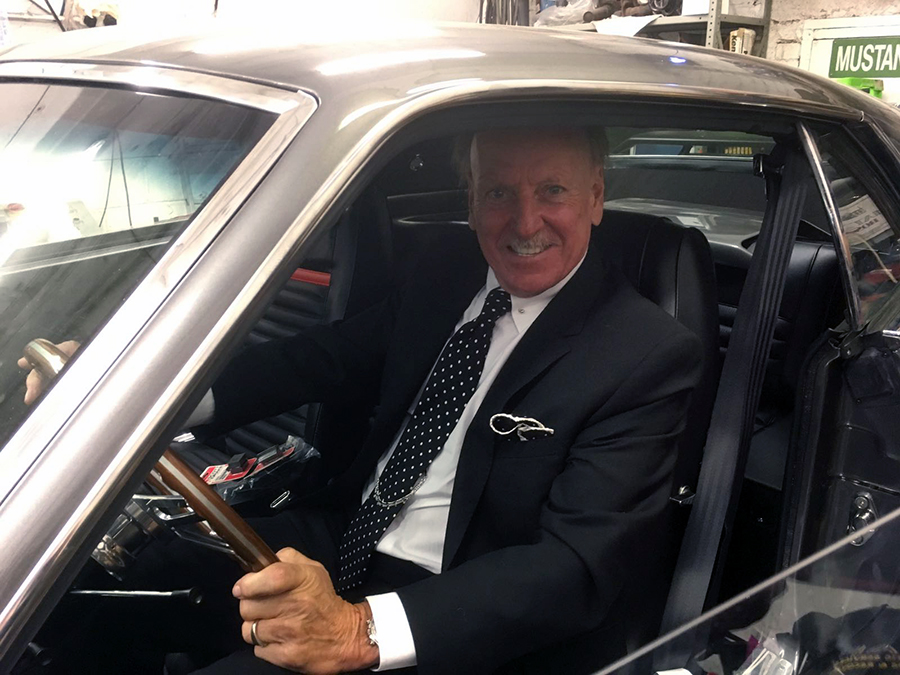
Adam used his GPS speed app to take her out for a first spin, where to? Petrol station of course! There is some similarity here for comparison. Adam says “Why do they want Keanu Reeves when I am available?” You tell us!!!


Side markers had to be cut into place and final gap alignments after the road trip with everything bedded in a little. We are awaiting some special order scoop fittings that will allow the scoop to be added and not bend the or distort the hood.


What does she sound like? Well listen to the video of her on idle.
The owner of the car came down to see the progress so far. We thing a picture speaks more than our words can say.
Update 16/10/2016
Traction bars for the rear axle now been fitted to improve handling.


Geometry setup for the car and the seat now in place.


Update 9/10/2016
This week we get straight back to the popular John Wick build and as the old saying goes, we “turned up the wick” and moved her on leaps and bounds. We have pretty much finished the outside now with the front lights being fitted, badges and the rear spoiler added.


The engine is now being built up with the air filter now decided and fitted which really suits the car, the sparkling new radiator and grill plate complete the look retro look. The steering has been upgraded to the brilliant Borgeson power system which makes a huge difference to the directional control.


The interior has had the custom made rear shelf and rear seat fitted. To complete the movie car look we have the wooden steering wheel for that quality feel.


The front interior takes more work obviously to fit in the upper dash to complete the wiring installation. The front seat will be one of the last things to go in so we have room to work. All of a sudden the John Wick car is coming together very quickly.
Update: 28/9/2016
The glass is all in now and has taken time to set them up correctly.


Update: 14/9/2016
A lot has happened over a couple of months:
As this is the first build of the John Wick in the UK, this car has generated a lot of interest, just like the 60 Second Eleanor’s did when they were the car to have. We have now got most of the running gear on the car. We have replaced the front brakes with a new set of disc brakes and calipers, new rear brakes, leaf springs.the suspension needed to be replaced too. The new brake booster and reservoir have been fitted with our own proportioning valve and new brake lines. The engine has gone in and now start to get the plumbing and connections ready.


The loom is being wrapped in our own fabric tape as we go along in order to give that so important factory fitted look.


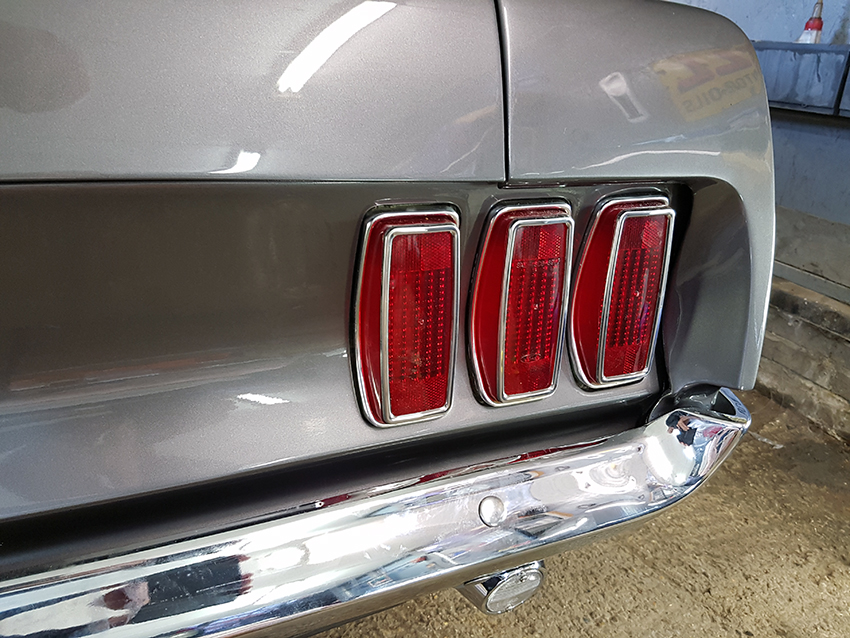
The rear lights are fitted with our own bespoke LED kit to make sure the car is safe and seen.
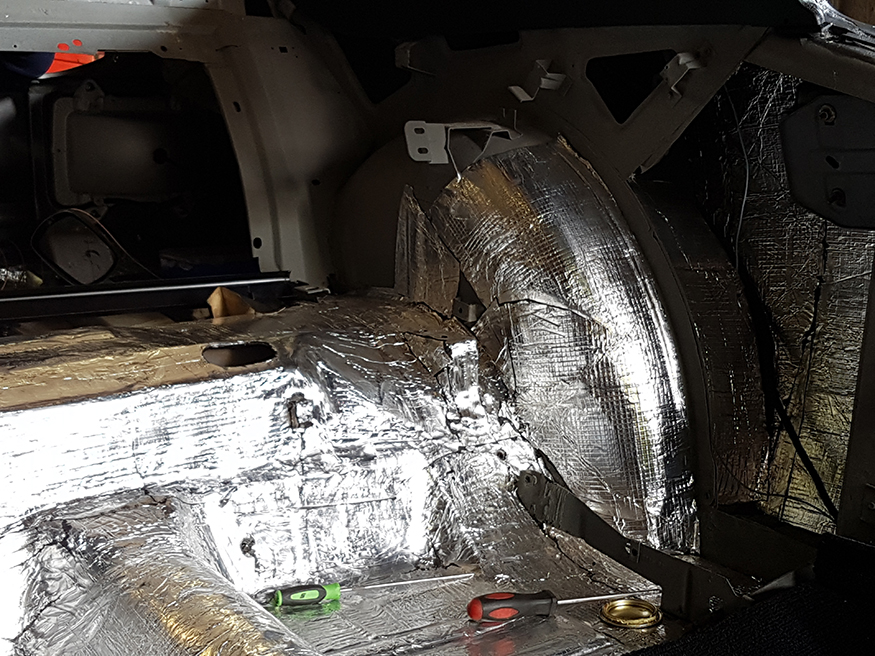
The inside is going to be sound proofed throughout, which by its nature is another slow and unseen task. The sound proofing is a silver matt with a very sticky backing that will adhere to the floor pans and inside the panels, doors or just about anywhere you want to stick it. Heat the material up with a hot air gun to rub and mould the pieces into place, it’s like a giant jigsaw puzzle, but a sticky mess version.


The trunk area is now also sound proofed and could potentially be seen, so plenty of care is taken in this area.


There are still some things that need to be sorted out to make the car look correct to the film, we will get round to those details a little later on. For now though, the car is at that slow stage where preparation is everything and the work is virtually never seen because it’s all covered up with carpets and panels.
The rest of the car that needed to be sound proofed has been done ie. the wheel arches, these are always difficult due to the angles and shapes involved.
While the windows are out the head liner has to be fitted, Yogi got busy and spent a day fitting it and the rest of the evening getting the glue out of his fur, he told us the glue had made the cup of tea permanently stick to his hand! We are not so sure on that one. 😉


Next up was the wiring, the kit comes with everything needed to wire the car back up with a new fuse box, relays and accessories. We managed to salvage some of the original under dash loom once we had checked it was all OK and we were happy with it. The lower dash was then fitted and looms run out to the engine bay. With everything out-of-the-way it makes life so much easier to complete the intricate jobs.


The trouble is you can spend a complete day doing things like this and it looks like you have done nothing. The secret is all the small steps and preparation, such as where the cables are going to run, what else need to be attached with the loom, where the looms will run to and from etc.


Here are some before and after shots of loom work. This kit requires a 1-wire alternator, but with our know how we can wire these kits up safely with a standard alternator. This doesn’t look like much, but the work involved to remove or add some wires and re-crimp into the original fittings is a dark art. The solenoid is almost ready for the final connections and the loom to be wrapped with our own loom tape for that authentic stock look.


With most of the climbing around inside the car done we could fit the carpets. Again this looks like just throwing in the pre-cut carpets in place, but you have to trim and create the fitting.


The rear of the car has been completely wired up now and the fuel tank has been fitted in place. The outside of the car has seen the new handles fitted so we can open and shut the doors properly now.


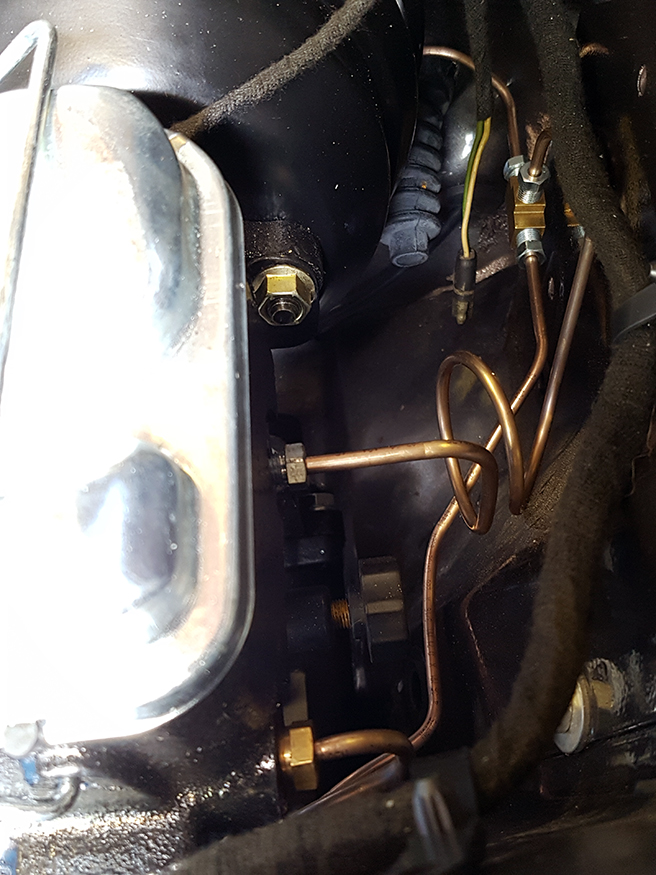
The brakes are all in place now, bleed and the special Yogi treatment performed on the brake lines.
Did You know?
Each car’s brake lines that Yogi has to fabricate are subtly unique, that’s just how Yogi likes it apparently, works of art so he says! Unless you want the standard routing of course which he will do for you too.
This week we have been focusing on the exhaust, fitting the marker lights, front lights, setting up the LED rear lights and the rest of the engine wiring. The owner of the car has even bought the number plates down for us to put on the car, even though she is not finished yet. How could we refuse. 🙂 The exhaust has been custom fitted with the Flowmaster exhaust boxes which will give this lady a real bark when she starts up and help the performance too.


t’s funny but as soon as glass starts to go in the car it looks so different. The front screen, rear screen and the right side glass has been fitted and aligned up now.


The front end has started to have some of trim added and the rear trunk is now locking via the key.


Update: 30/7/2016
This car has generated a lot of interest, just like the 60 Second Eleanor’s did when they were the car to have. We have now got most of the running gear on the car. We have replaced the front brakes with a new set of disc brakes and calipers, new rear brakes, leaf springs.the suspension needed to be replaced too. The new brake booster and reservoir have been fitted with our own proportioning valve and new brake lines. The engine has gone in and now start to get the plumbing and connections ready.


